Yamaha KX 650 belt replacing
I got the chance to own a broken Yamaha KX 650 cassette deck from 1993 for cheep. It is a three head deck, with three motors and a dual capstan. It comes with Dolby B,C and HX PRO and adjustable Bias. It is a pretty solid mid range deck.
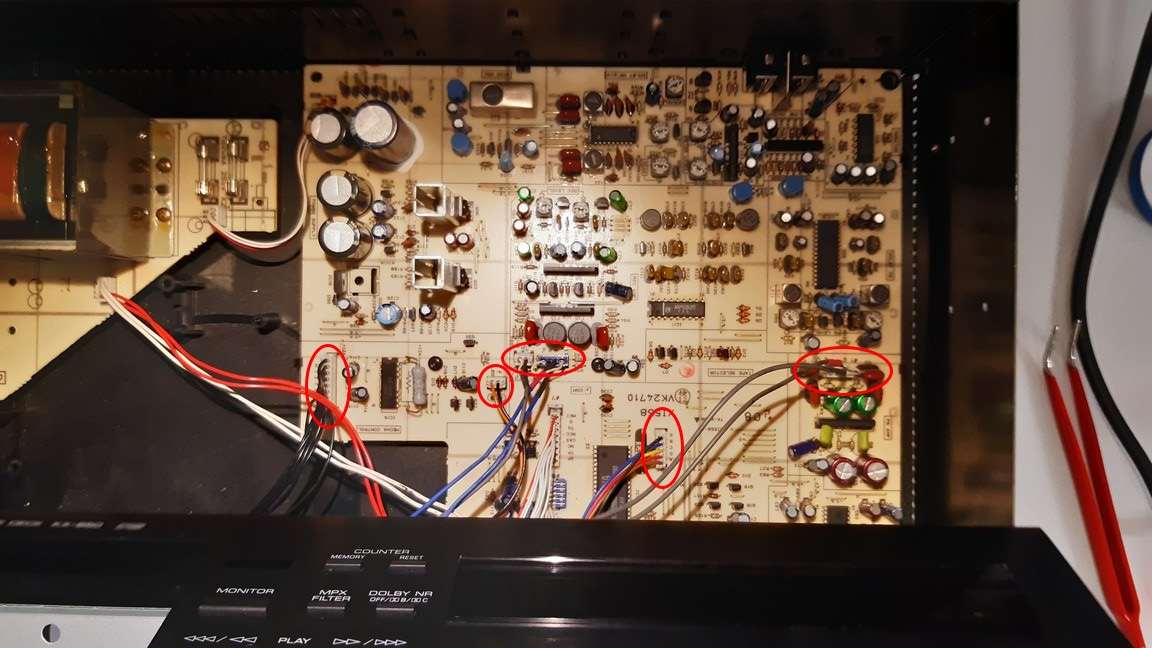
The previous owner already tried to replace the belt but failed. He told me it turn on but does not play. After a quick inspection it was quite obviously he had some issues in disassembling the tape mechanism. Some metal pieces where bent (ouch!), a motor connection was shorted and the PCB on the backside of the mechanism was cracked. As a result the deck did not detect whether a tape was inserted and one of the motors did not spin due to the short cut.
I had to completely disassemble the mechanism, soldered the broken trace on the PCB, fixed the motor connection and lubricated the capstan (very) carefully. Finally I replaced the belt, did some cleaning and adjusted the capstan speed. After reassembling the tape deck was just working as new. The Yamaha KX 650 is a great machine that can deal surprisingly well even with some old tapes I have back from the 80s. The play trim feature comes handy to 'fix' the higher frequencies if old tapes sound dull.
With this photo story I want to show how to correctly disassemble the mechanism of a Yamaha KX 650 for replacing the belt.
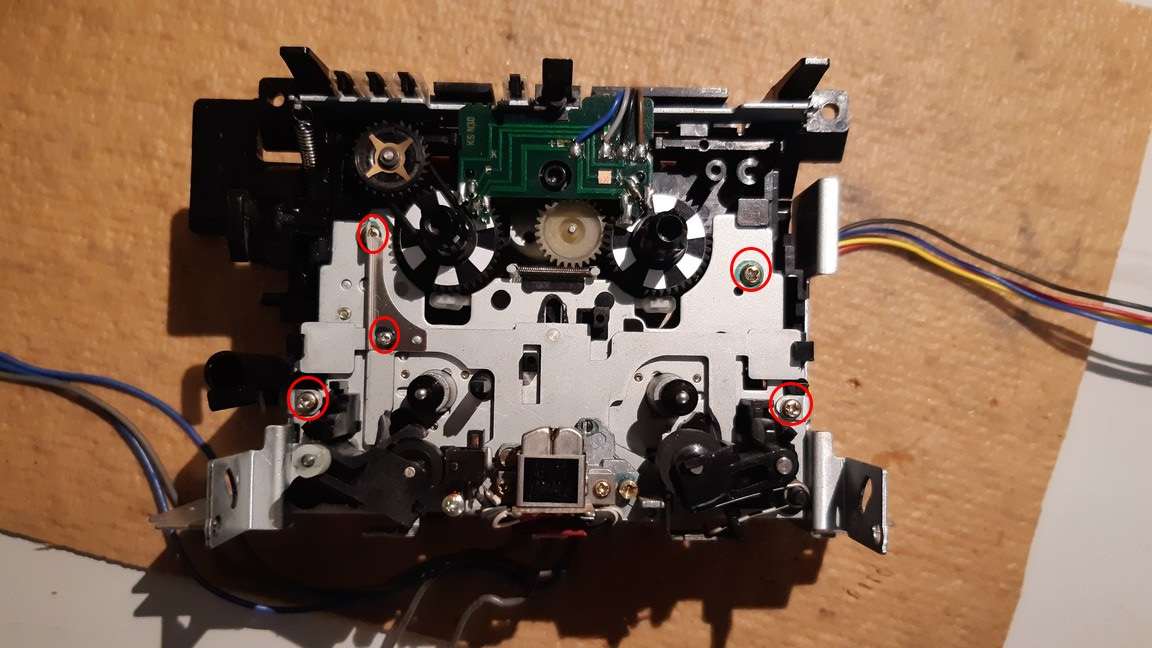
Tape mechanism overview

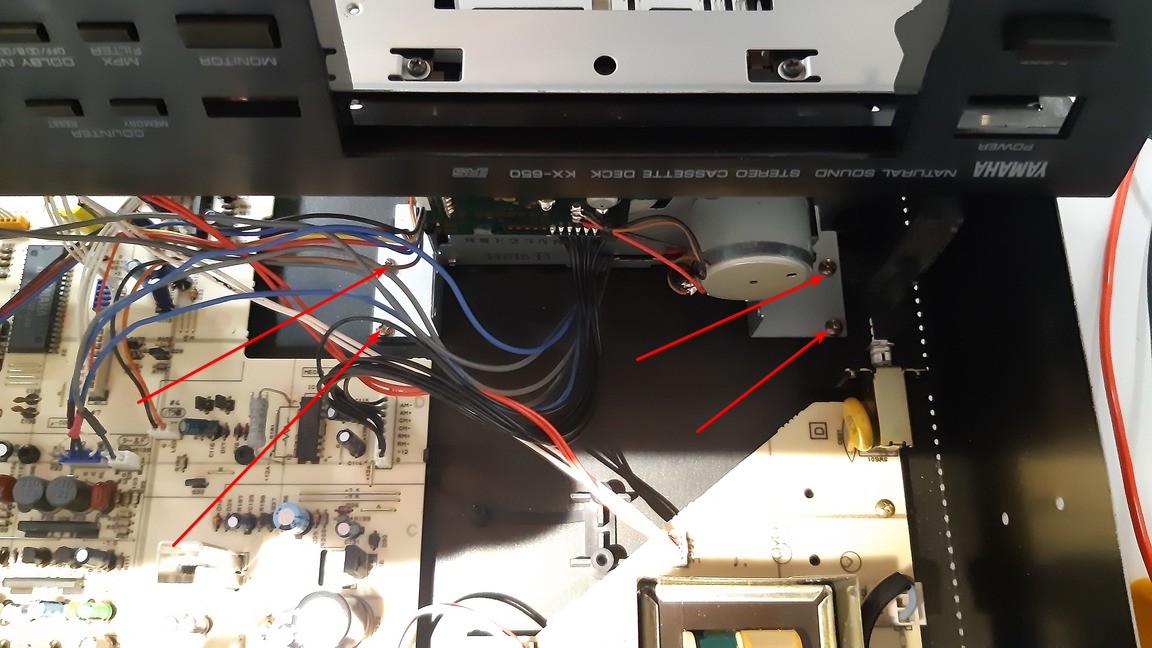
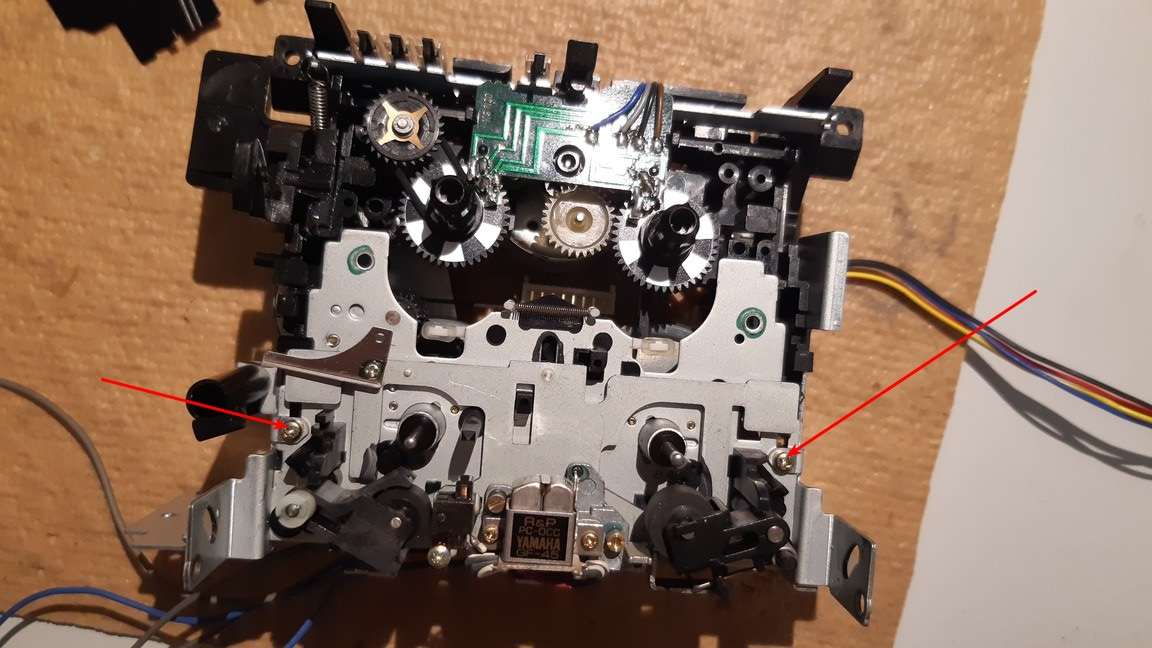
Overview of the screws to remove on the back of the mechanism
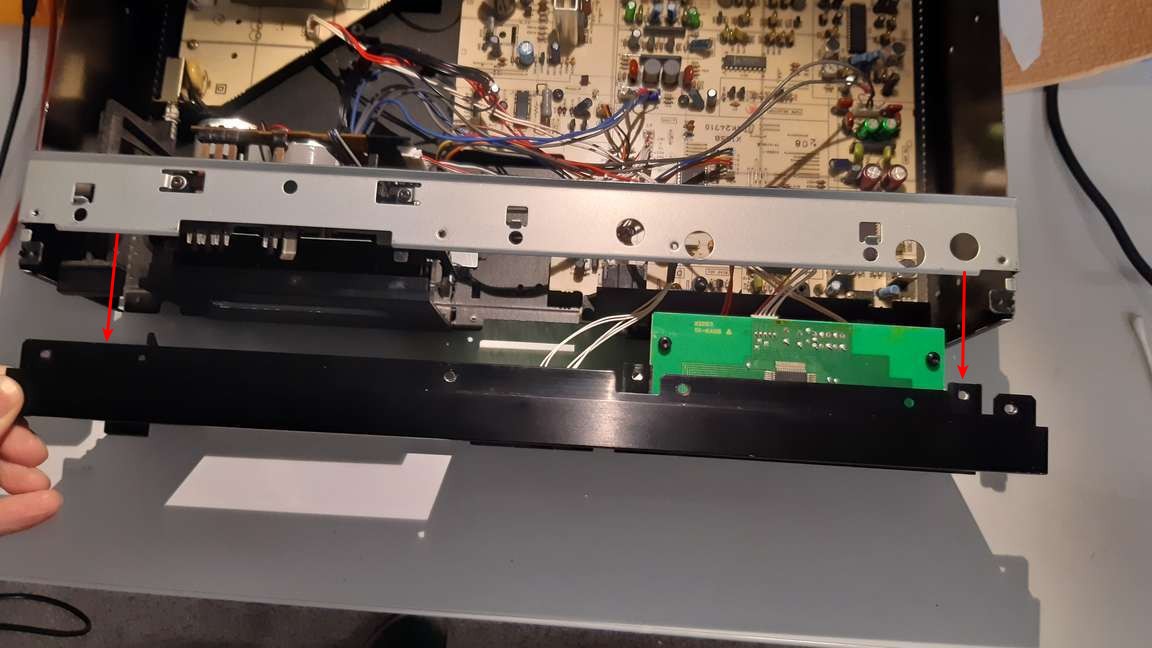
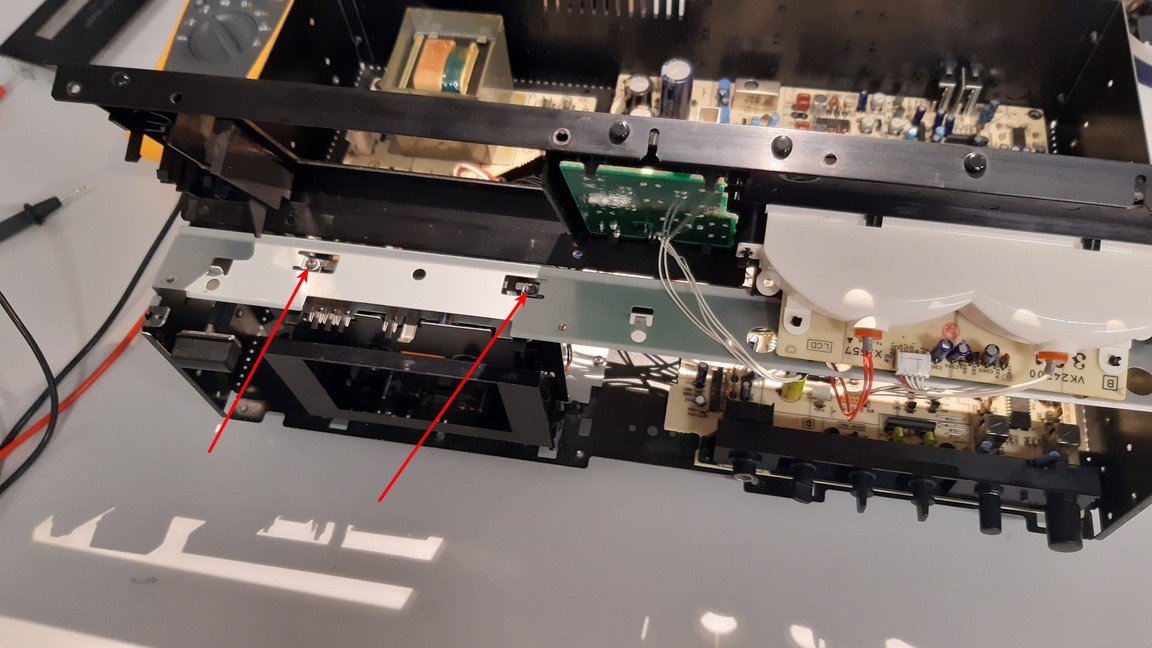
Overview of the screws to remove on the front of the mechanism
Step by step guide
Let us start from the beginning. First open the housing and remove the front plate.
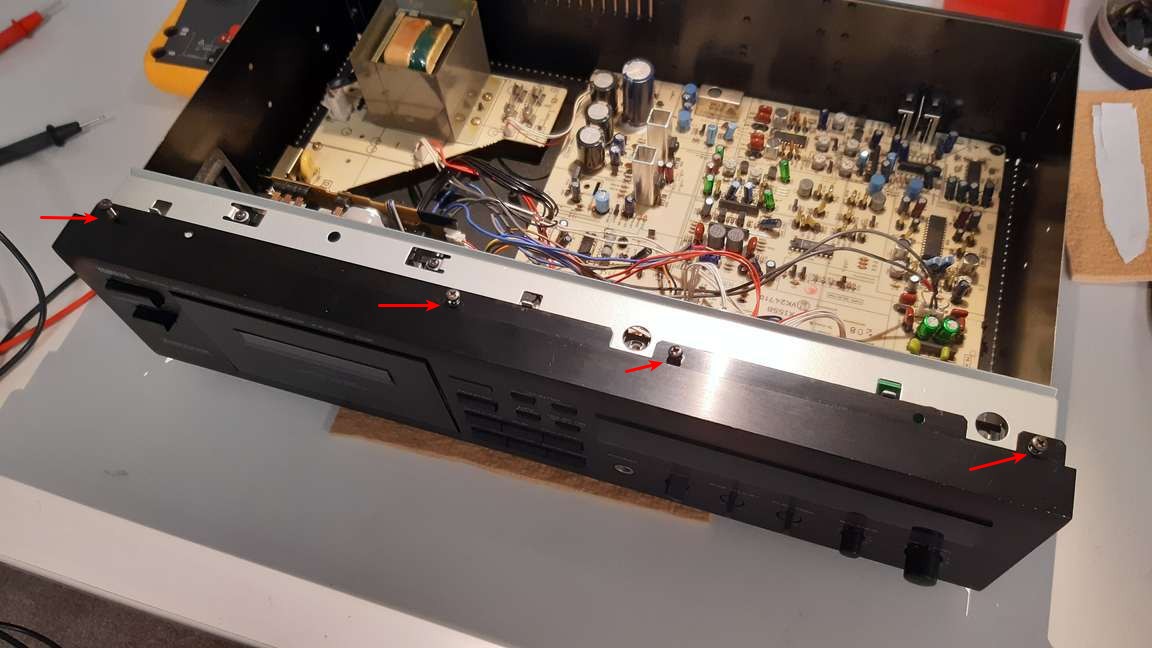
Remove these screws on the top
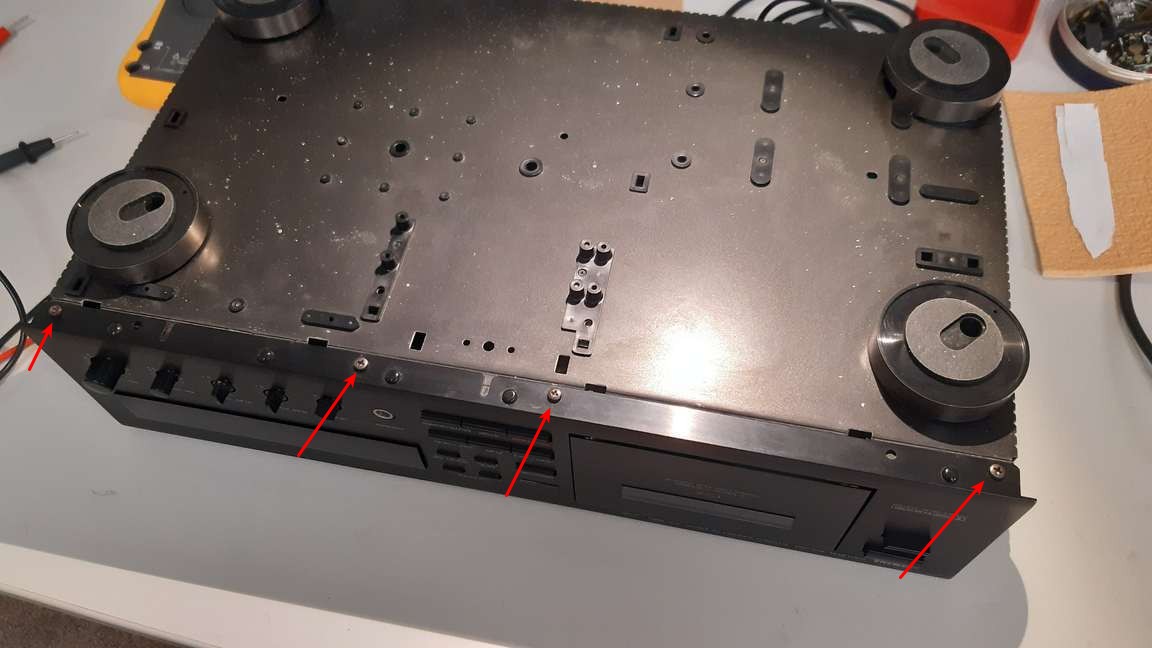
Remove these screws on the bottom
Pull the front apart. Take care for the display connector as the cable is quite short. You may place the front on top of the chassis like shown on the pictures.
Take the front apart.
Do not break this connector
Time to remove the cassette door. Simply lift the door as shown on the pictures.
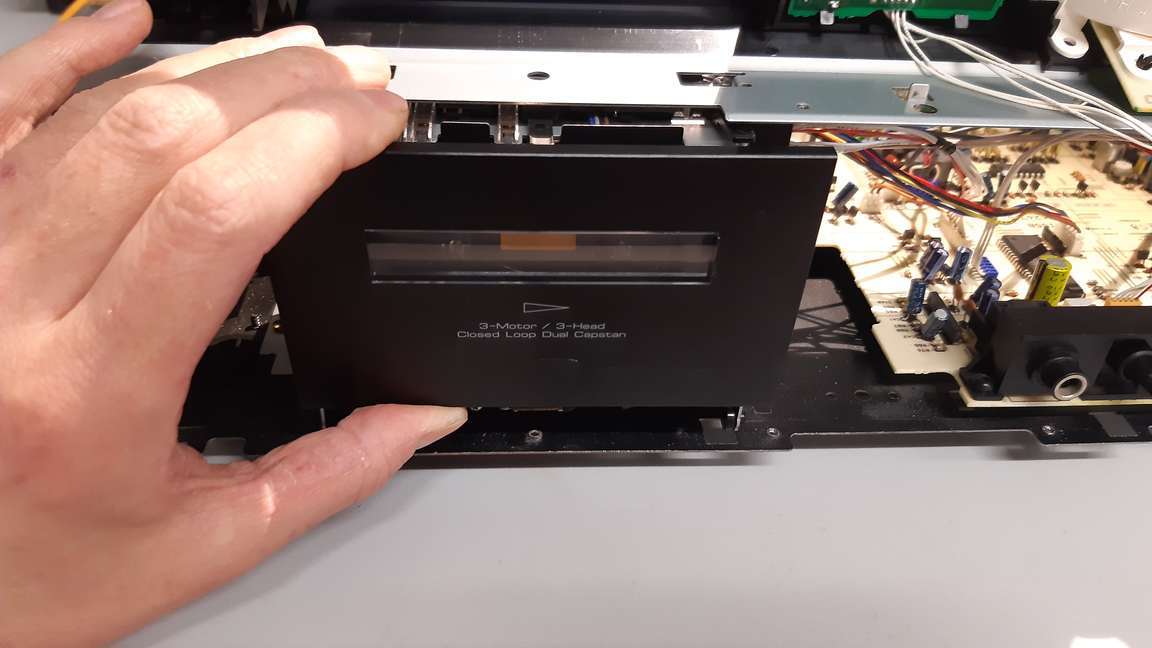
Lift the door...
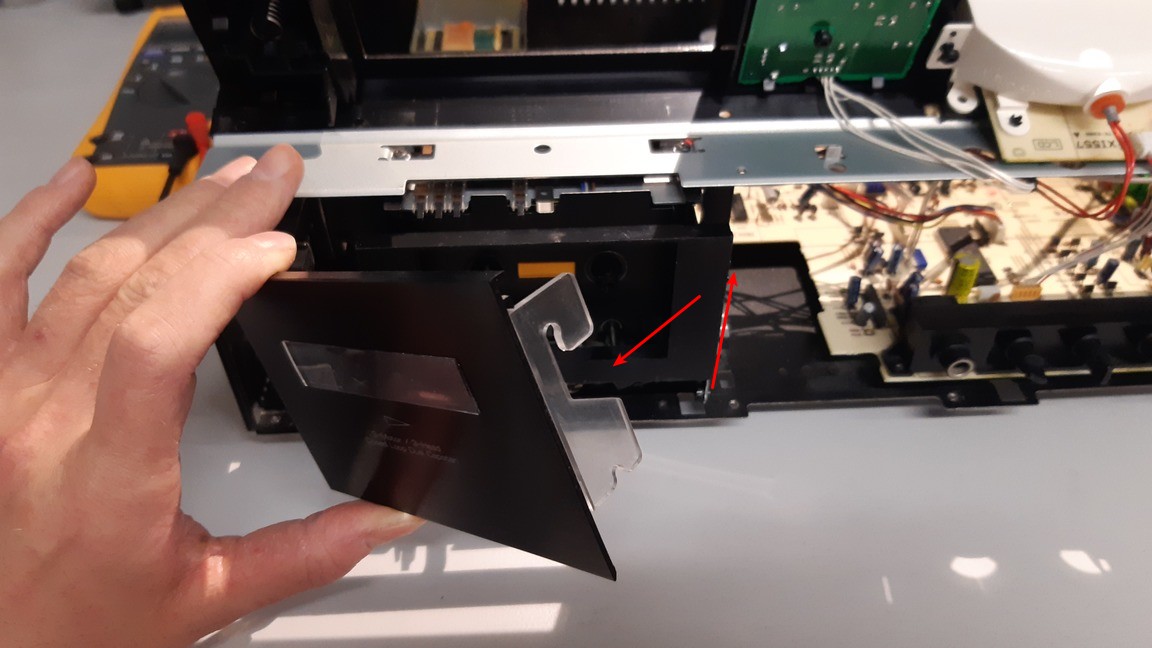
... and there it is
Remove screws of the mechanism. There are six screws in total.
Remove these screws. There might be a cable attached (not on my picture)
Remove the four screws on the bottom.
Remove the power switch lever to get access to the screws.
Slide to the left to remove the lever
The mechanism with all screws removed
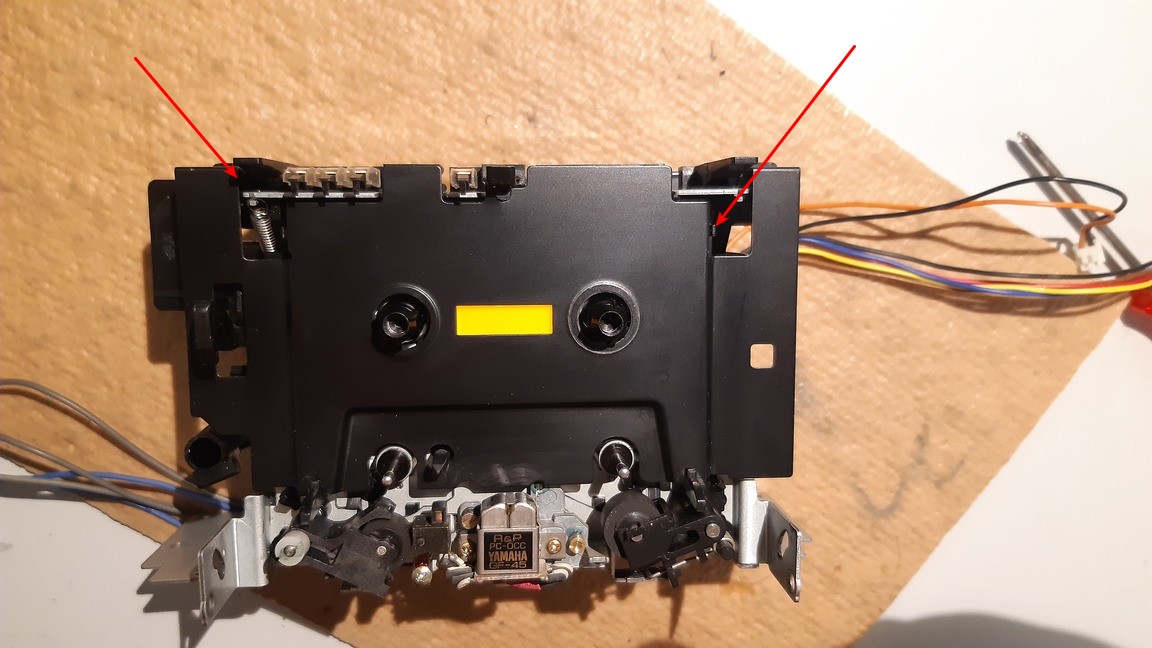
There are small hooks on the bottom, holding the mechanism in place. You have to push it back slightly to free it, then lift it over the hooks to get the mechanism out of the chassis.
Hooks are holding the mechanism in place
The hooks are on both side, left and right
Push the mechanism back to free it
Lift the metal frame a bit to get the mechanism over the hooks on the bottom
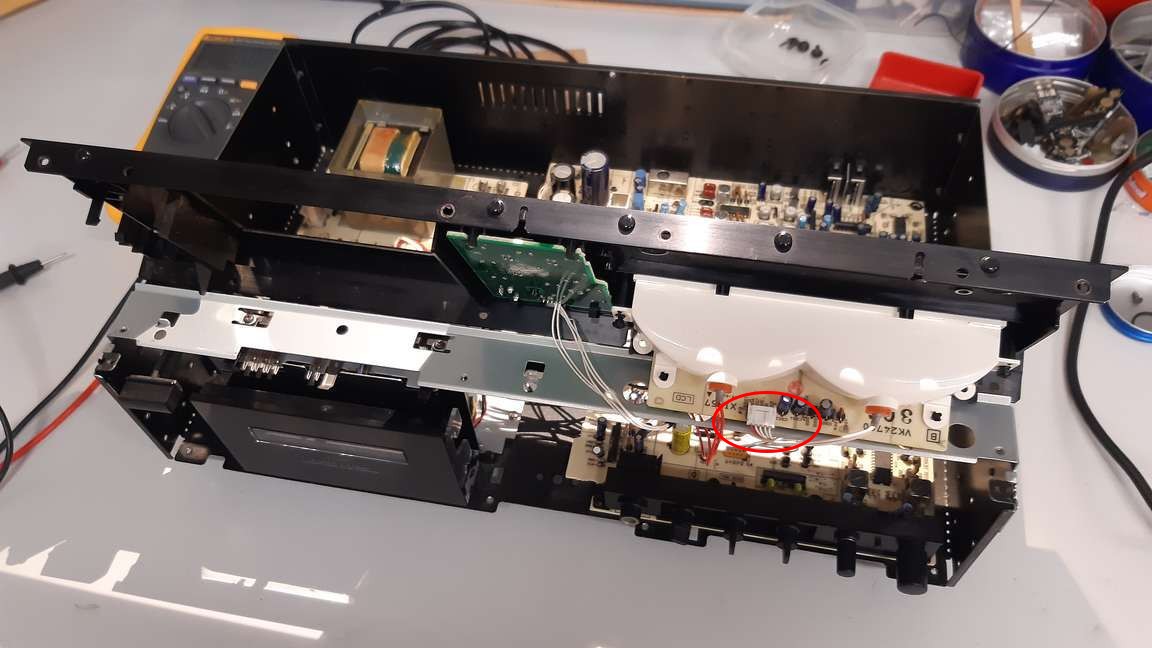
Unplug the cables marked on the photos. Take care so not cable goes off.
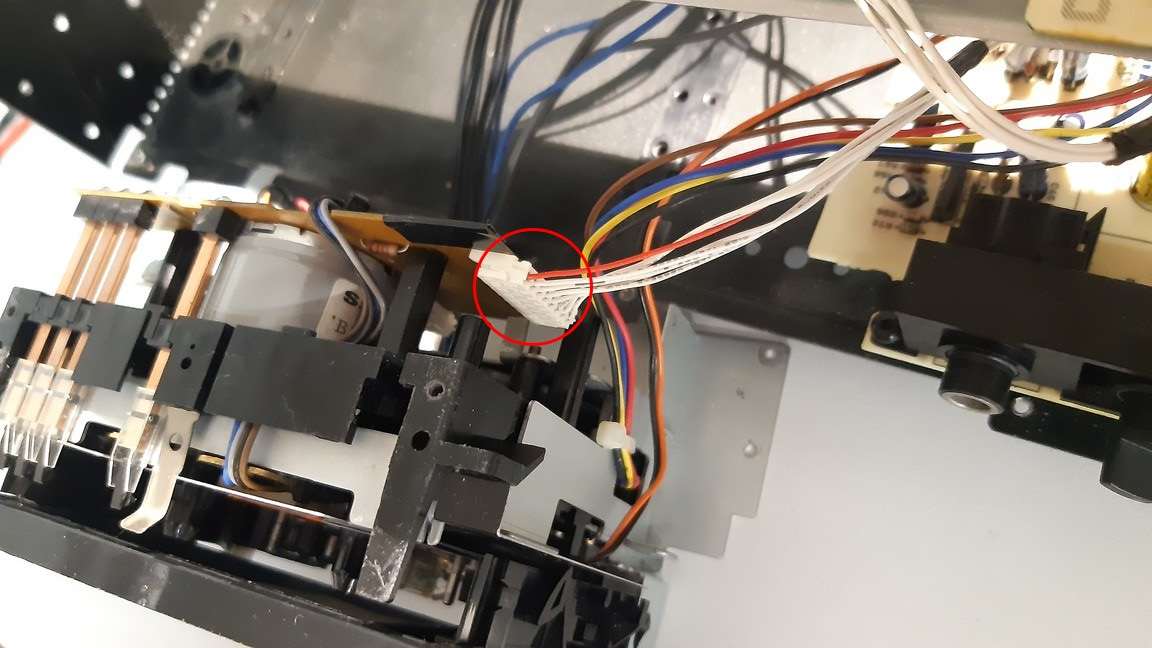
Remove this cable from the mechanism directly
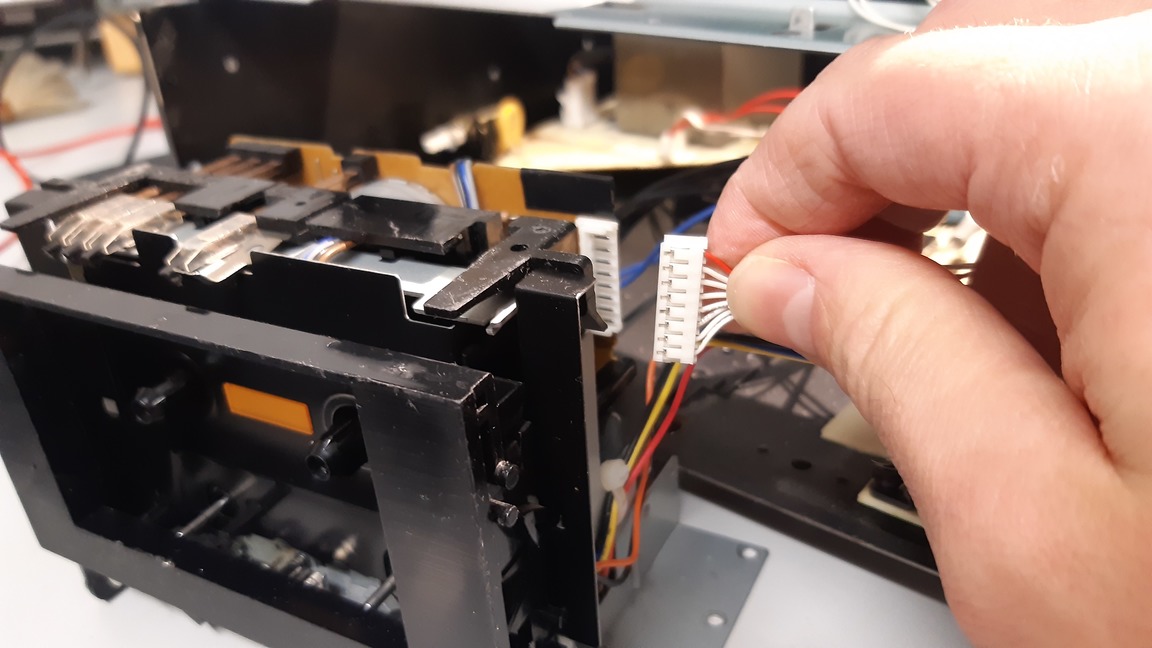
Take care so not cable goes off
Unplug all cables marked here.
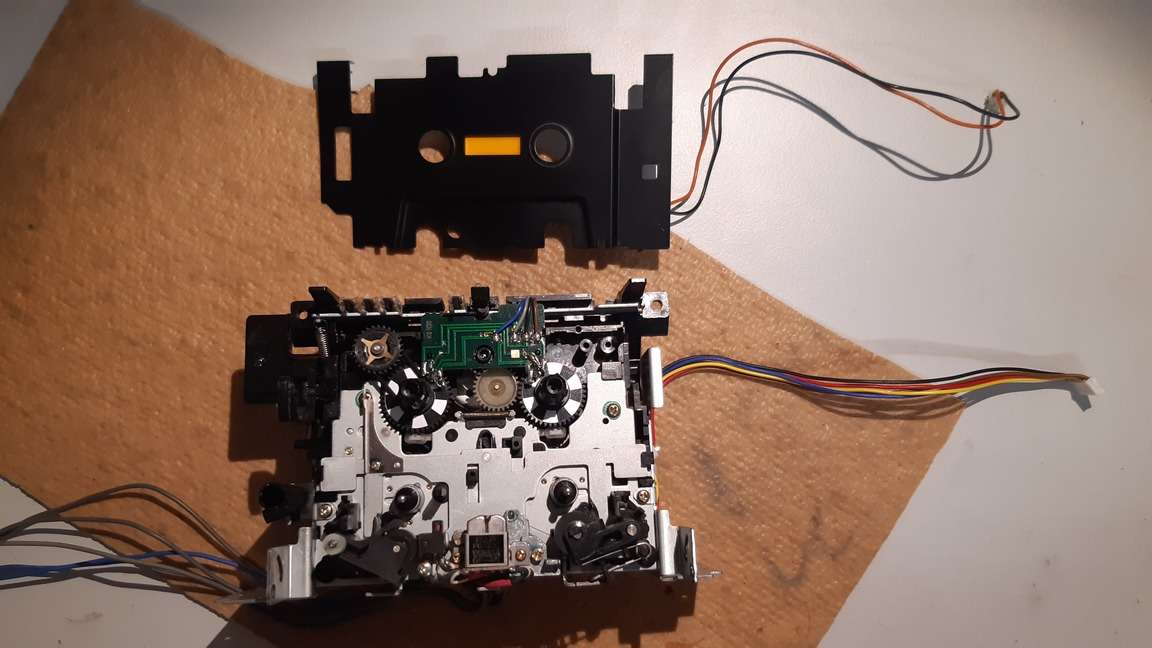
If the mechanism is free, put that chassis away. Now it is time to get access to the belt.
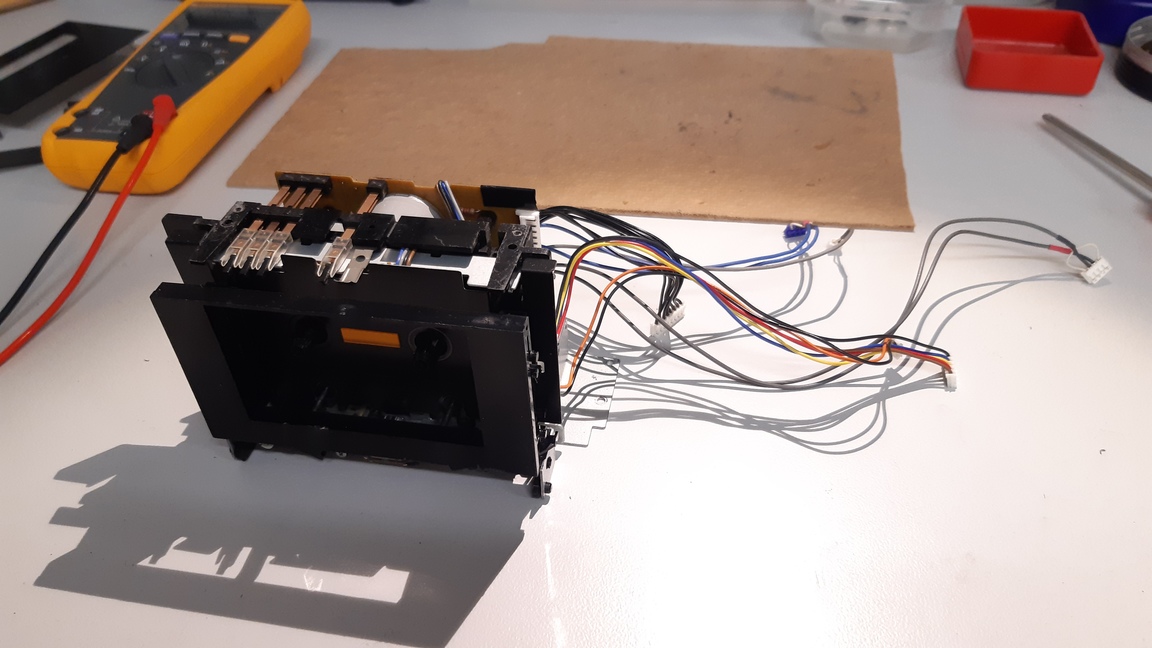
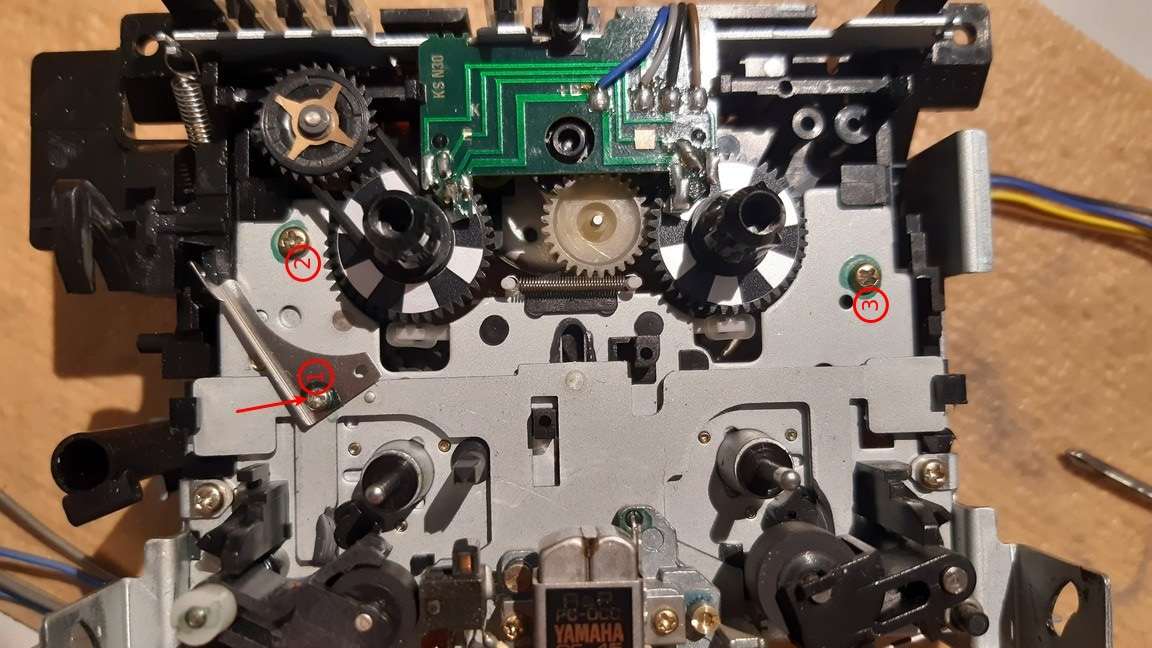
This is the heart of this cassette deck.
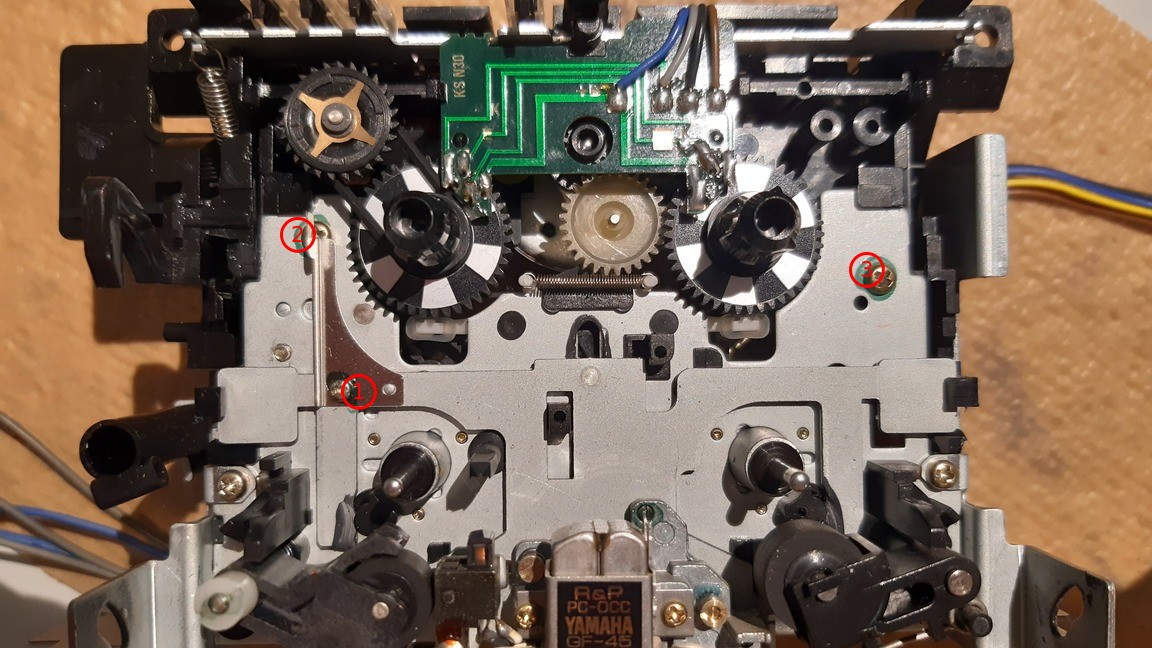
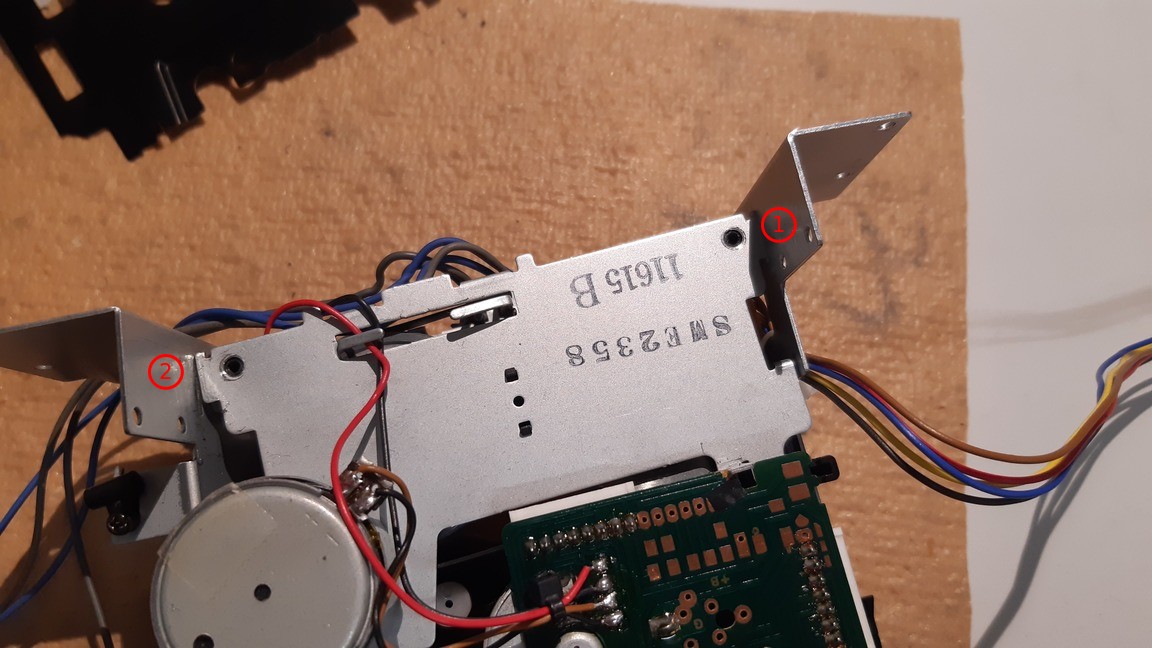
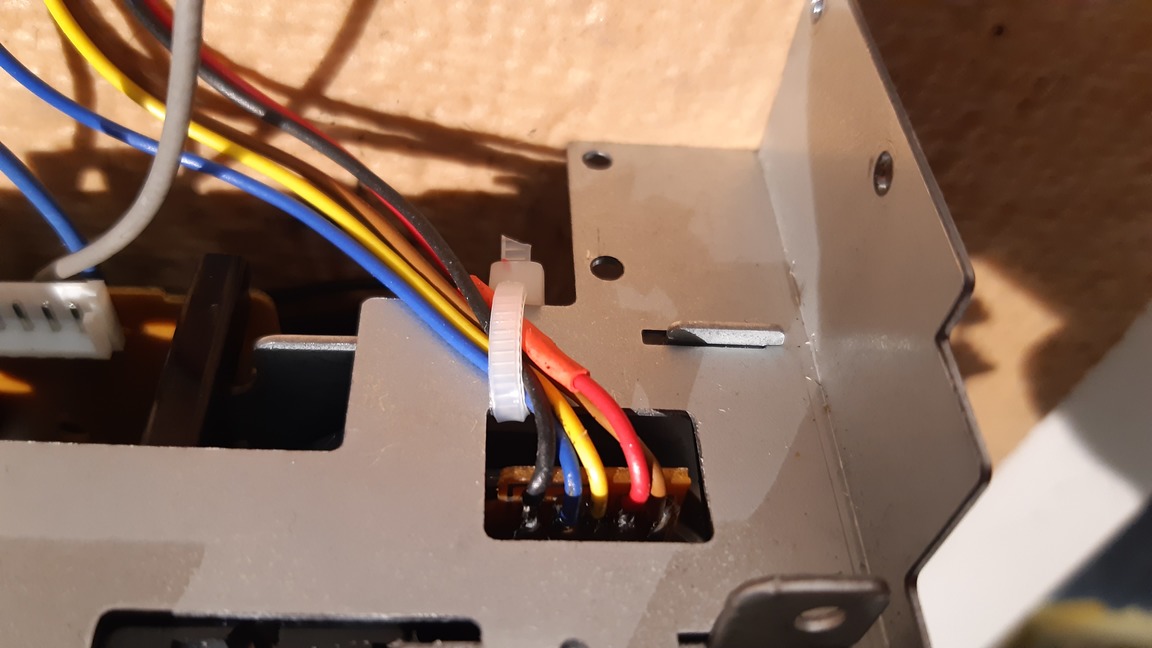
Free the cables by carefully bending the metal clamp (1). Then unscrew the screws that hold the capstan plate in place (2)+(3)
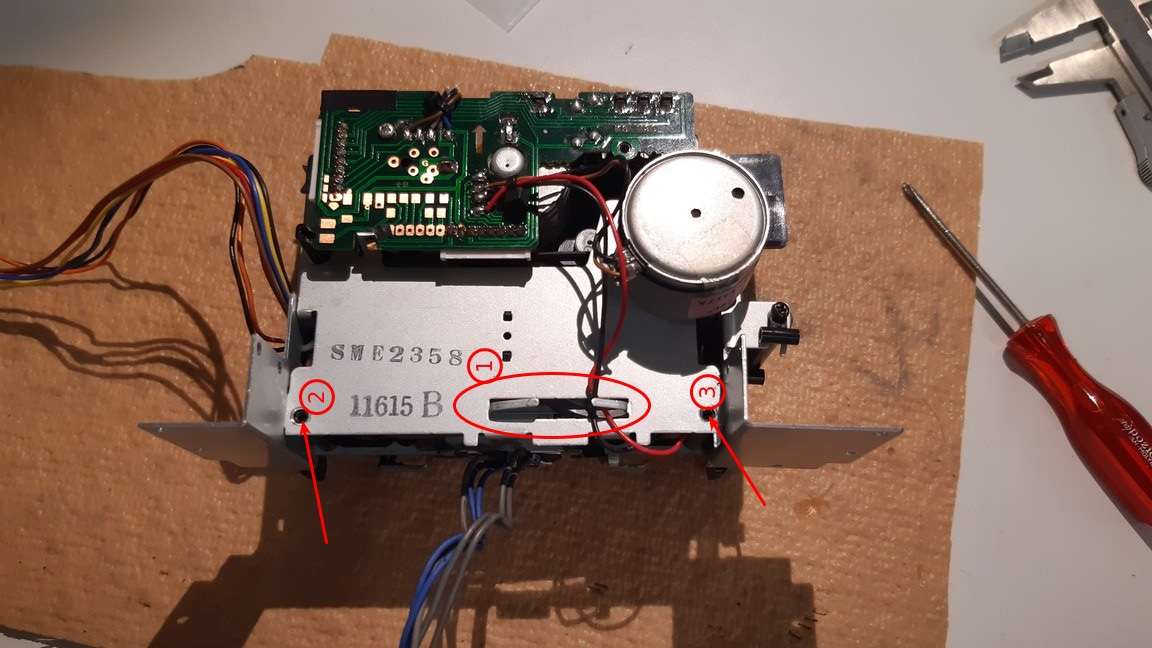
Unscrew the capstan plate.
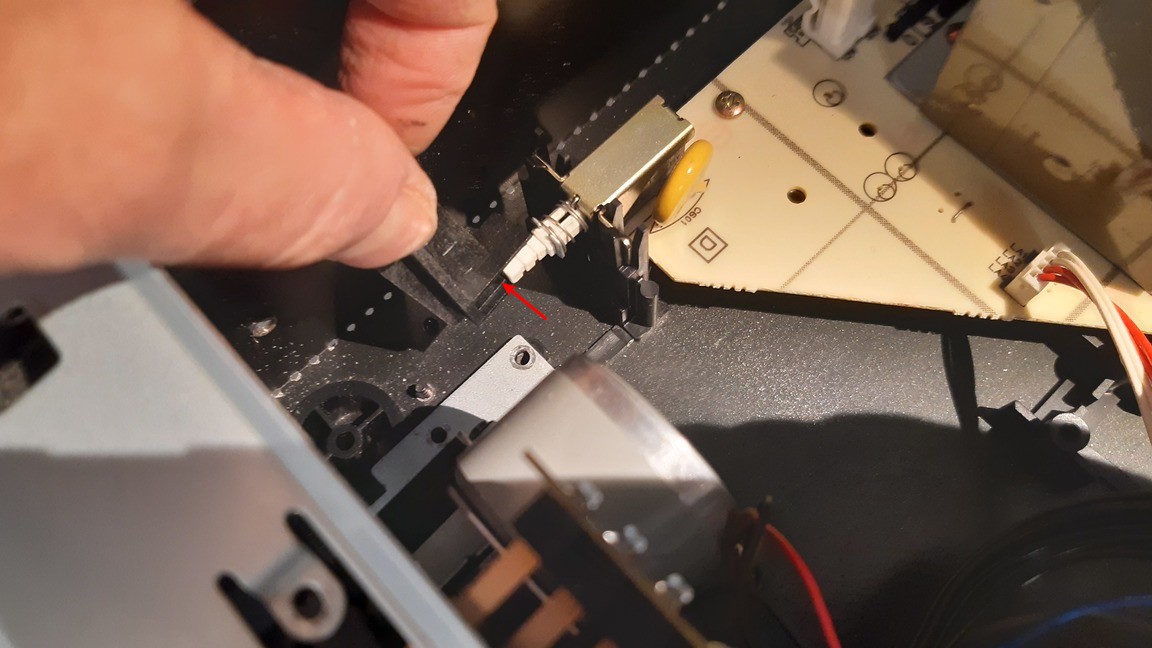
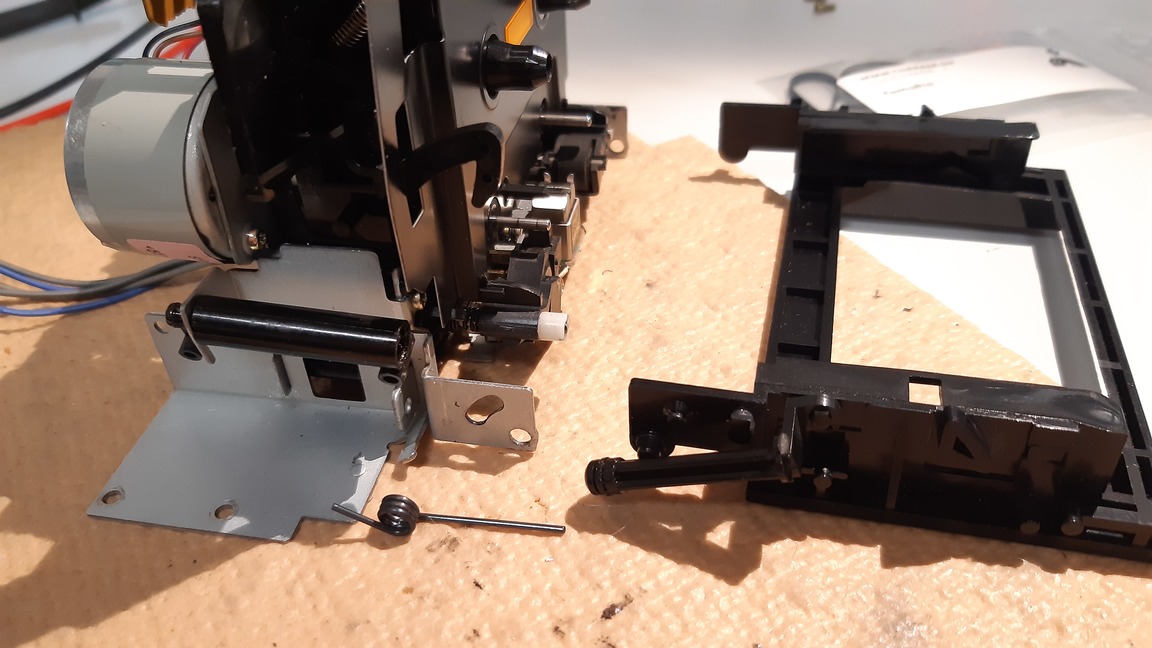
Now we have to remove screws on the front. To get access to these screws we have to remove the cassette holder and the inner plate of the tape mechanism. First remove the spring (1) and get the cassette holder detached (2)+(3).
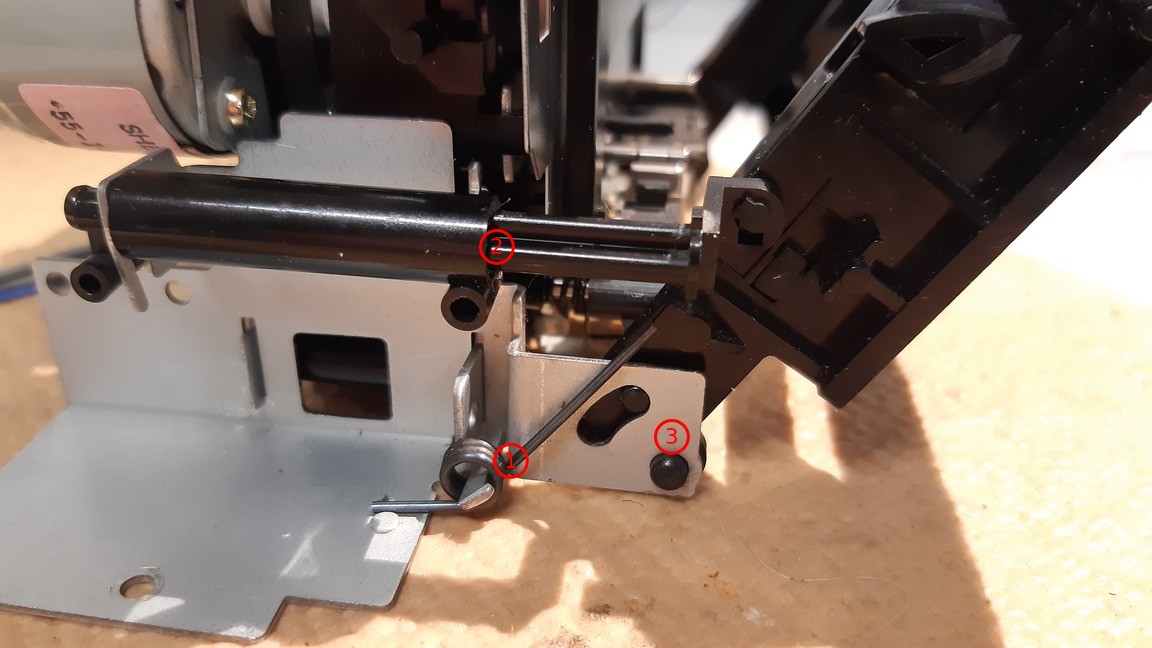
Three things holding the cassette frame in place
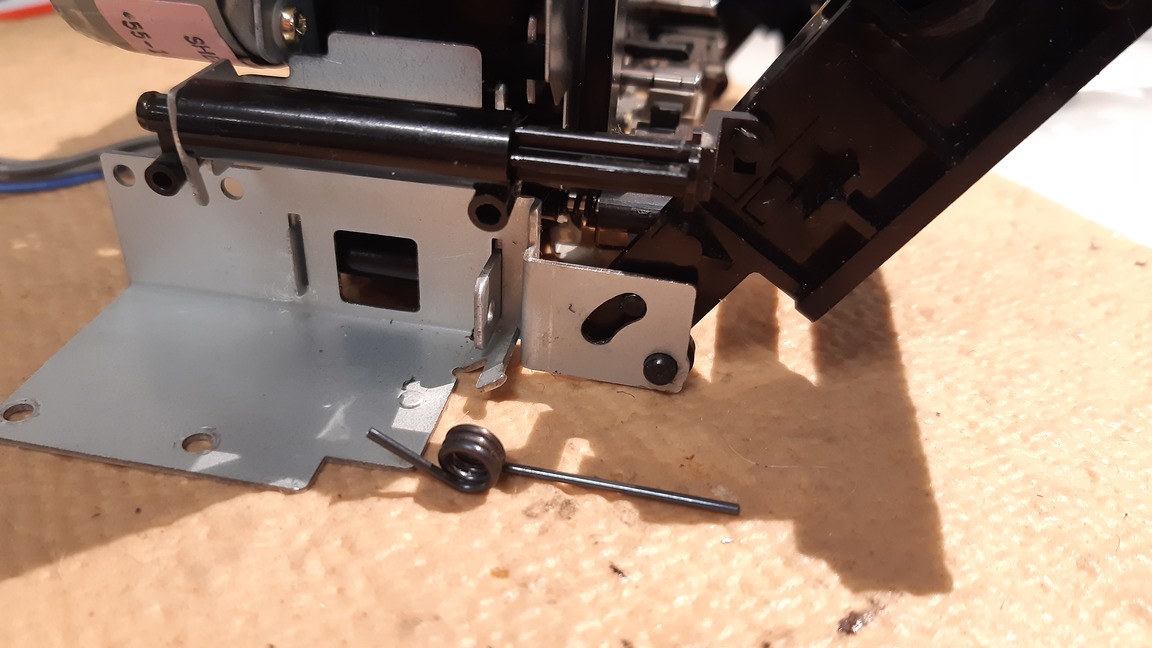
Remove the spring
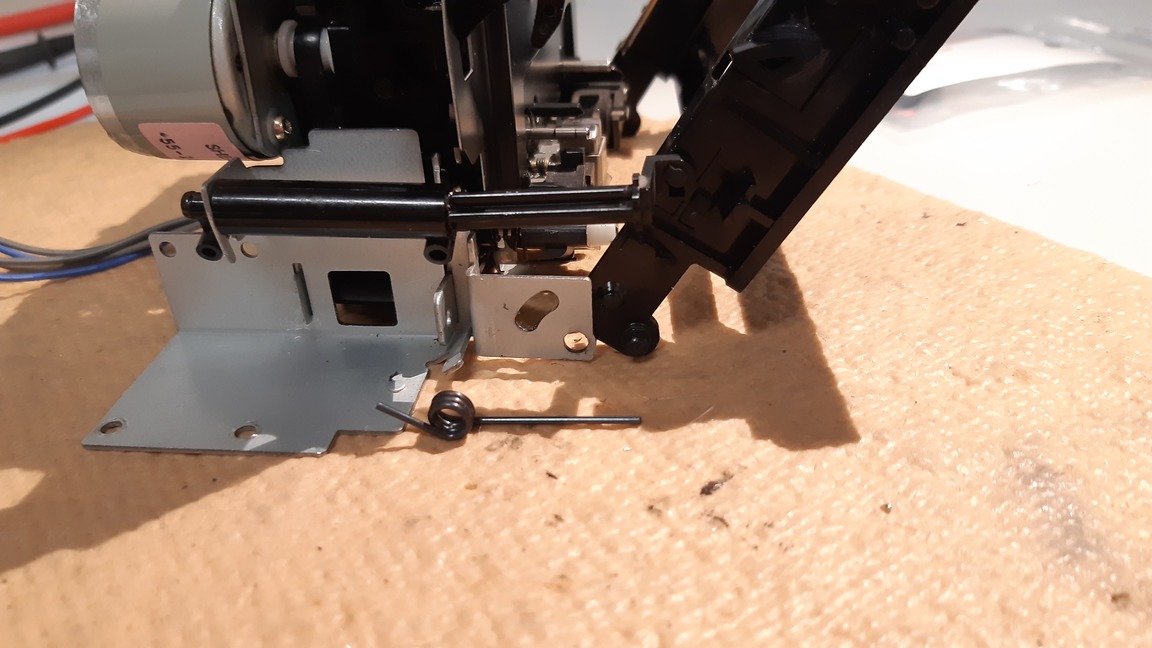
The cassette frame is almost free
Done
To remove the inner plate two tiny hooks have to be pushed using a small screwdriver.
Two tiny hooks holding the plate in position
The plate removed
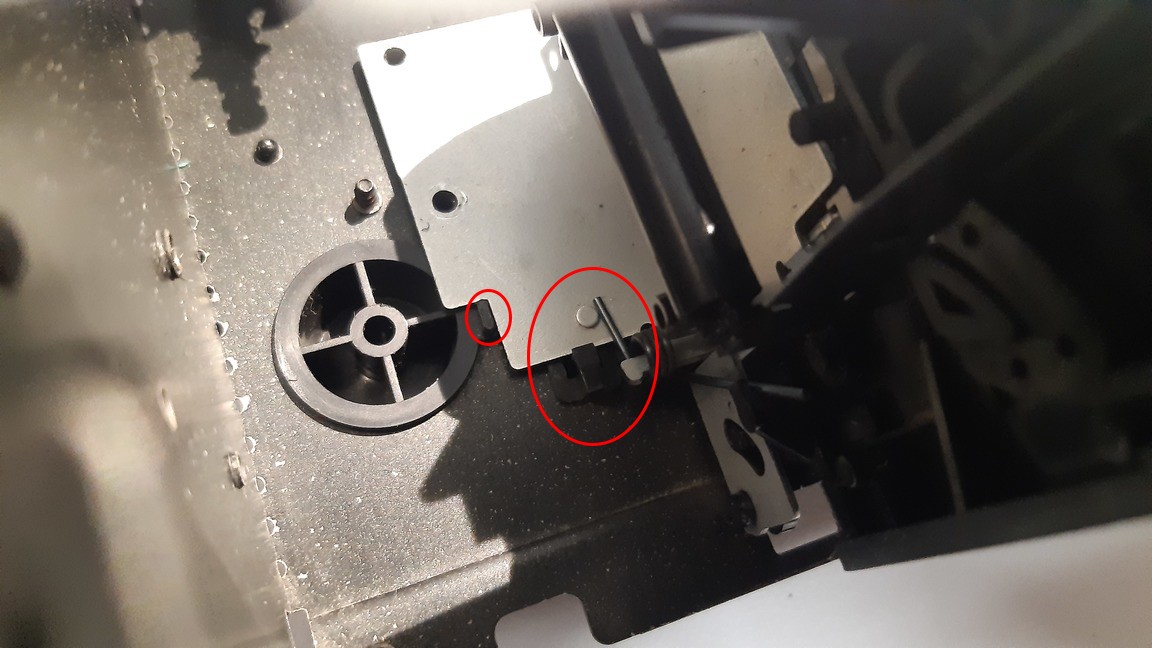
There are two screws (2) + (3) are left but to get access to screw (2), the little metal piece (1) has to be removed first.
These screws have to be removed
The two main screws can be unscrewed
The screws are removed on the front
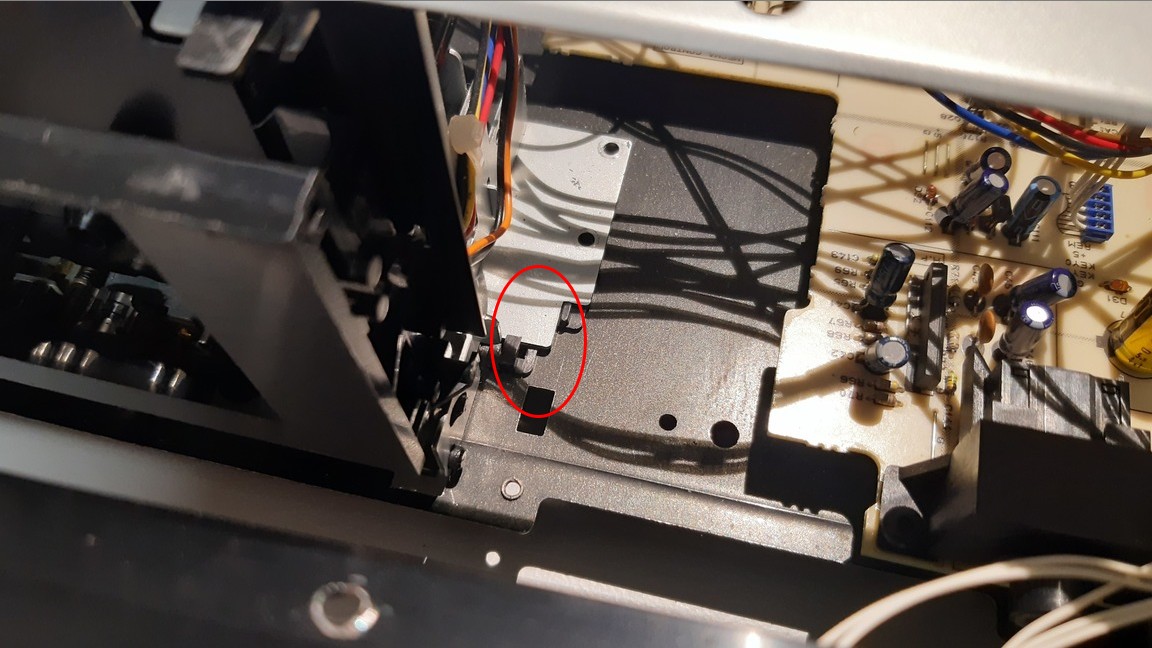
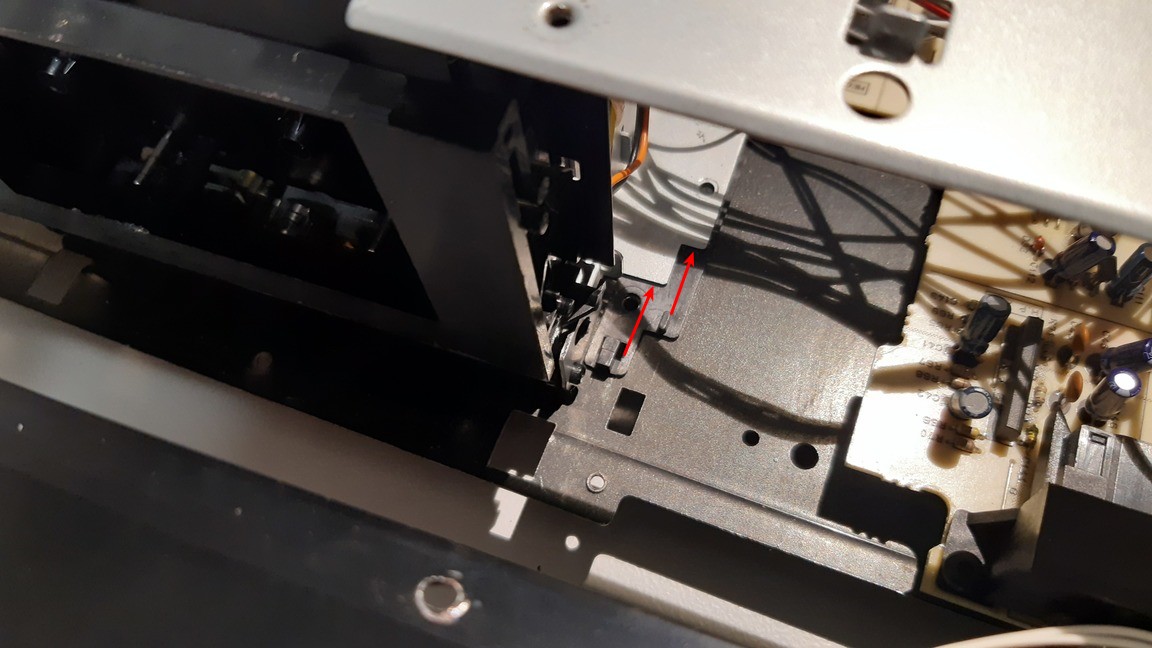
Pull the upper part of the mechanism to release the metal hook from the PCB. Take care to not damage the traces on the PCB. As you see my PCB is already slightly damaged in that area.
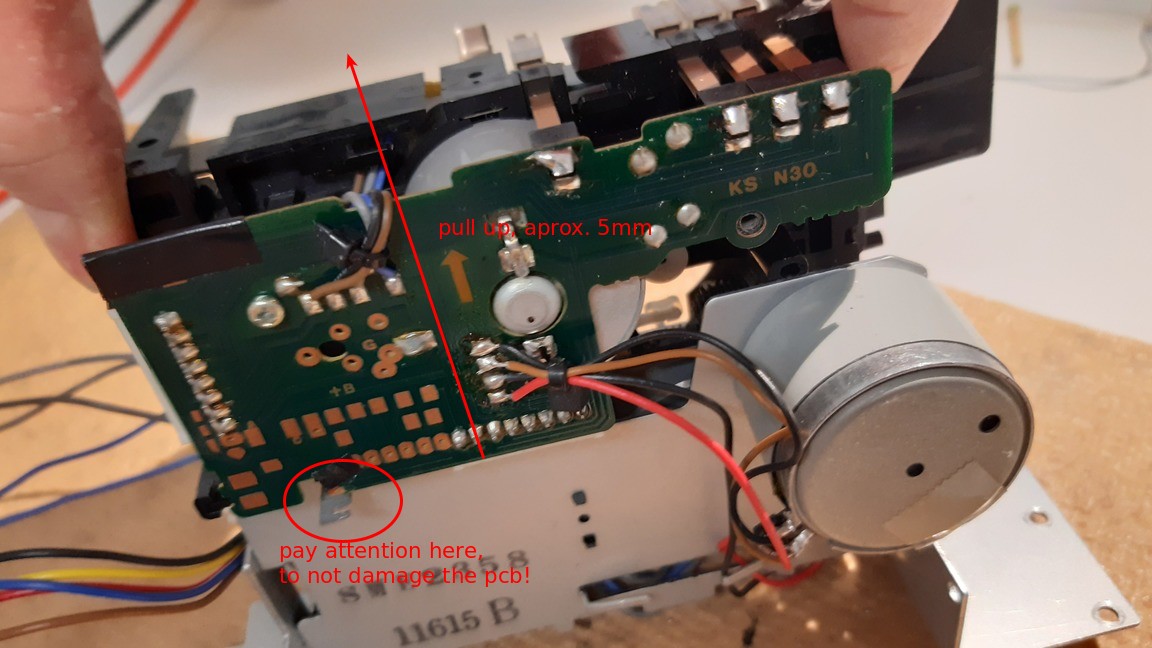
Free the metal hook of the PCB
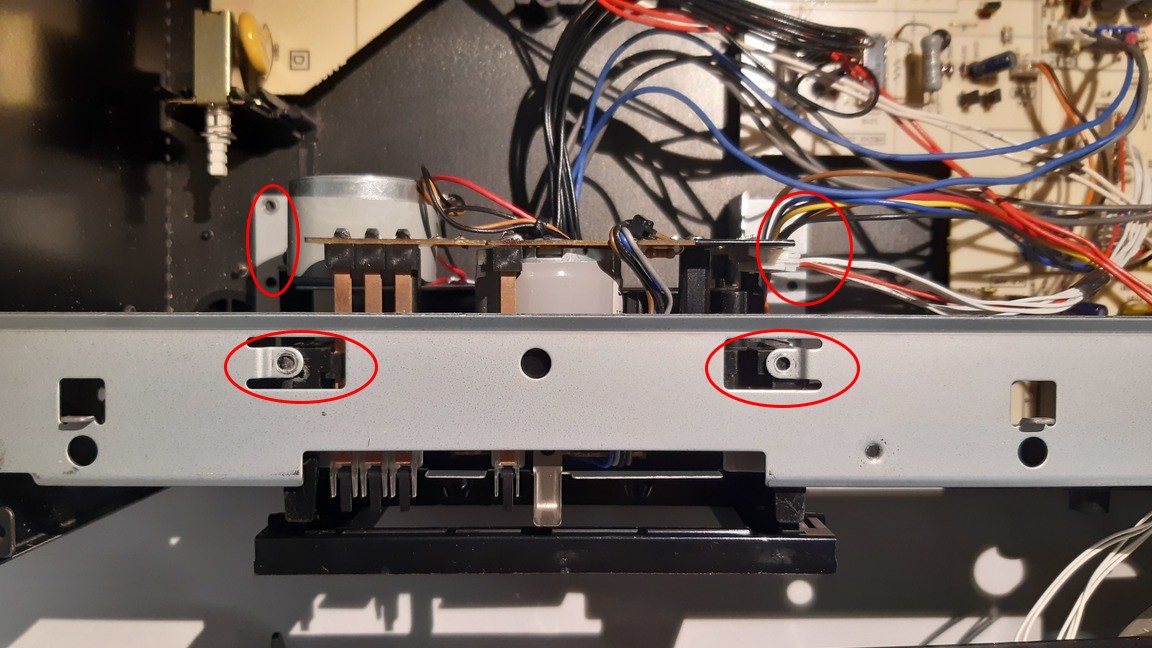
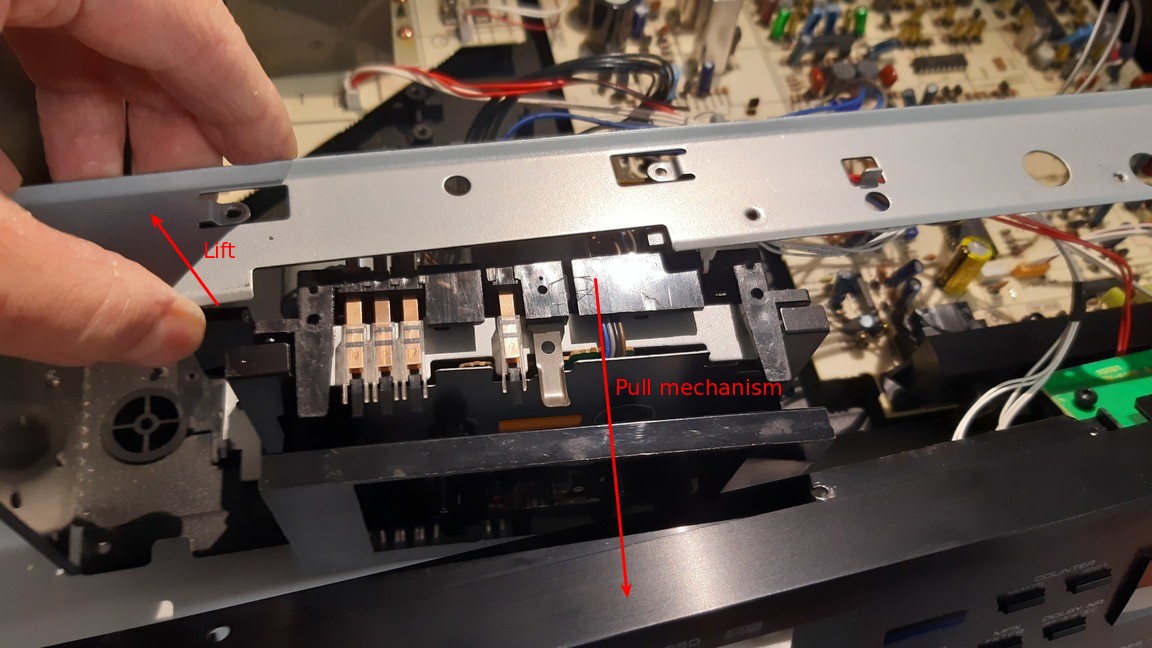
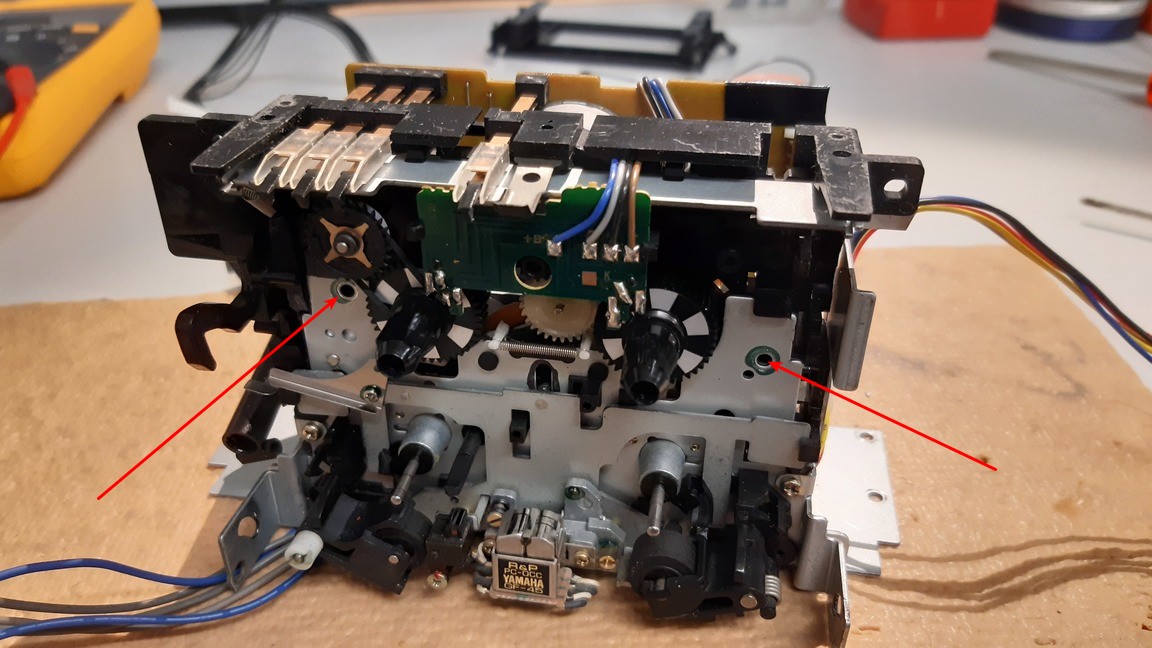
As a next step the metal plates on the side (1) and (2) have be removed. This is necessary to finally lift the capstan plate.
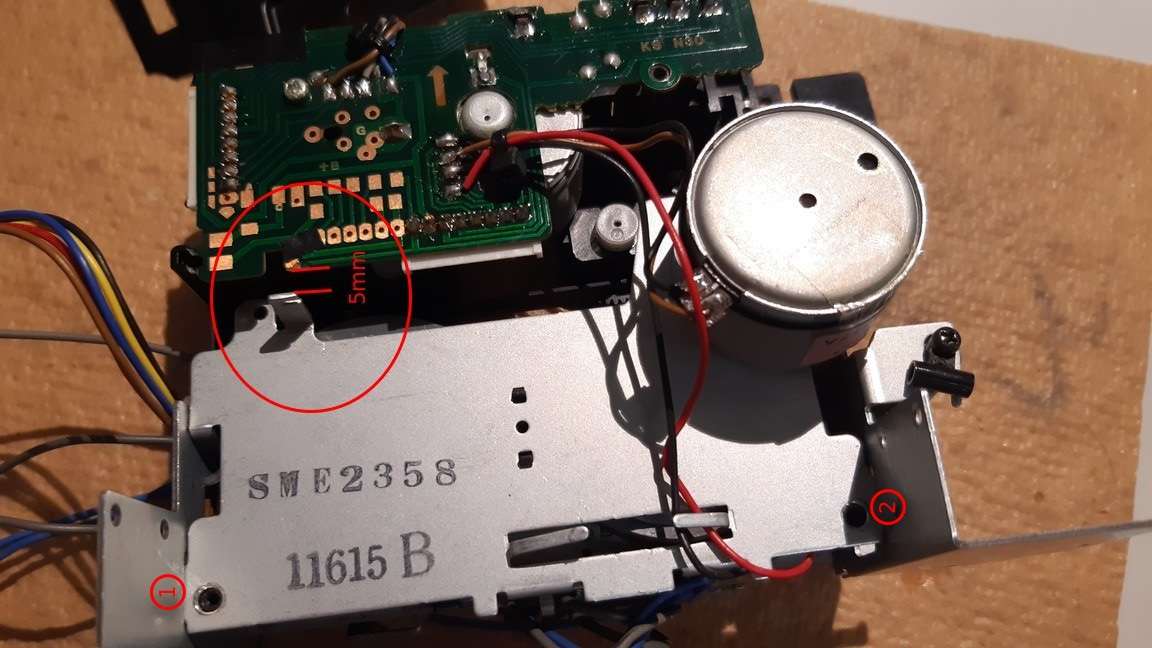
These metal plates have to be loosened to remove the capstan plate
Remove these screws on the front
The plate is free
Finally the capstan plate can be removed and the belt can be replaced. Note: the cables on the side may get off easily. It happened to me twice. You may tape it or use a cable tie to prevent such accident.
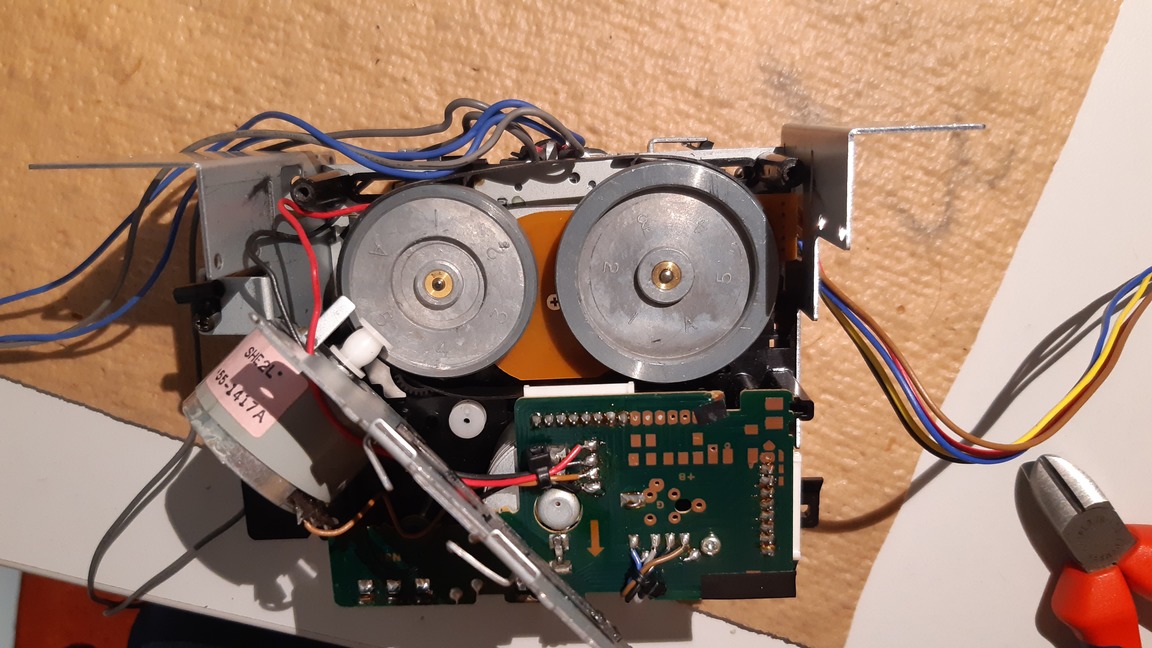
Two big fly wheels of the closed loop dual capstan mechanism
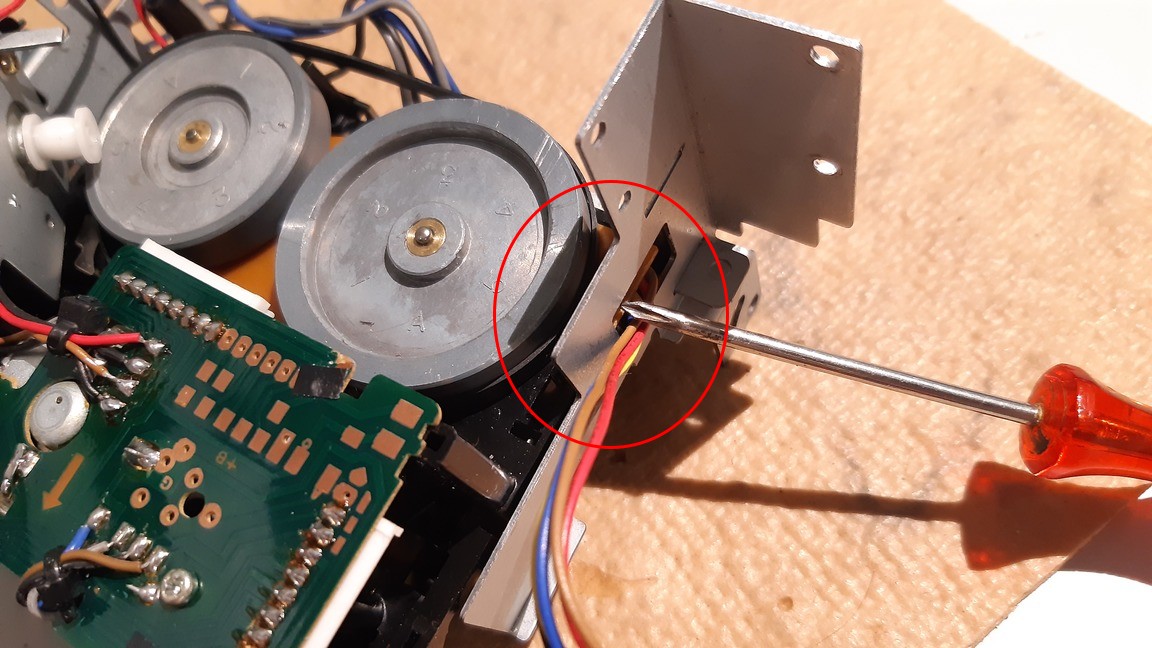
These cables might easily fly off
I fixed it to prevent more accidents here